During the extrusion production of HDPE pipes, deviations in any link such as raw material properties, equipment status, and process parameters may lead to product defects or production line shutdowns. This article sorts out the specific manifestations, underlying causes, and quantifiable troubleshooting processes of high-frequency faults for five core systems (raw material and plasticizing system, die and forming system, cooling and sizing system, haul-off and cutting system, electrical and control system), and supplements daily preventive measures to help improve production stability and product qualification rate.
I. Raw Material and Plasticizing System Faults: Precise Resolution of Source Issues
The plasticizing system is the core of the production line. Improper raw material handling or unbalanced equipment parameters will directly lead to melt quality defects, thereby affecting pipe performance. The following are refined solutions for 3 types of high-frequency faults:
1. Raw Material Caking/Feeding Blockage (Highest Incidence, Accounting for 60% of Raw Material Faults)
Fault Phenomena (Quantitative Description)
- Raw materials in the hopper form agglomerates with a diameter ≥ 5cm, the screw feeding rate fluctuates by > 10%, and the extrusion output drops by more than 20% sharply;
- The value of the melt pressure gauge fluctuates by > ±2MPa, and the pipe wall thickness deviation exceeds the upper limit of ±10% specified in GB/T 13663-2018 (National Standard of the People’s Republic of China for Polyethylene Pipes for Water Supply);
- Raw material accumulation “bridging” occurs at the feed inlet, and the screw current is lower than 50% of the rated value when idling.
Underlying Causes
- Excessive moisture content in raw materials (> 0.1%), causing moisture absorption and agglomeration due to relative humidity > 60% in the storage environment;
- The hopper has no heat preservation device, and dew forms on the surface of raw materials when the ambient temperature is lower than 10℃;
- Recycled materials are not screened, mixed with hard lumps with a diameter > 3cm or dust, blocking the feed inlet channel.
Troubleshooting and Resolution (Step by Step)
- Emergency Treatment: Stop the machine immediately, tap the side wall of the hopper with a copper rod to break the agglomerates, and it is strictly prohibited to use iron tools to avoid equipment damage; Remove the feed inlet protective cover and filter the agglomerated raw materials and impurities with a 40-60 mesh sieve;
- Root Cause Resolution: Start the two-stage dehumidifying dryer, set the drying temperature to 85-100℃, extend the drying time to 3-4 hours, and ensure the moisture content of raw materials ≤ 0.05% (verifiable by a moisture content tester);
- Long-term Prevention: Install an insulation sleeve on the outside of the hopper, and start the built-in stirring device (rotating speed set to 20-30r/min) in a humid environment; Maintain the relative humidity of the raw material storage area ≤ 60%, and use the opened raw materials within 48 hours.
2. Uneven Melt Plasticization (Directly Affects Pipe Mechanical Properties)
Fault Phenomena
- Unmelted particles (diameter 0.5-2mm) are visible on the inner surface of the pipe, the outer surface is rough with pitting, and the glossiness ≤ 80GU (standard value ≥ 90GU);
- The melt pressure fluctuates by > ±2MPa, the tensile strength of the pipe decreases by more than 15%, and the elongation at break fails to meet the standard of PE80 grade ≥ 350%;
- The extruder current fluctuates periodically, with a fluctuation amplitude > 10% of the rated current.
Underlying Causes
- The length-diameter ratio of the screw is < 30:1, the material residence time is less than 1.5 minutes, resulting in insufficient plasticization;
- Unbalanced temperature setting of the heating section, the temperature of the melting section is lower than 180℃, failing to reach the HDPE melting threshold;
- Excessively high screw speed (> 120rpm), the material residence time in the barrel is < 2 minutes;
- Excessively high additive ratio (> 5%), poor compatibility with HDPE, forming local unmixed areas.
Troubleshooting and Resolution
- Process Adjustment: Adopt the “gradient heating” scheme — feeding section 150-160℃, compression section 170-180℃, melting section 190-210℃, homogenizing section 200-210℃; Detect the actual temperature with an infrared thermometer to ensure the temperature difference ≤ ±3℃;
- Equipment Parameter Optimization: Reduce the screw speed to 20-80rpm, verify the material residence time ≥ 2 minutes through the speed-output curve; If the length-diameter ratio is < 30:1, replace it with a gradual screw with a ratio ≥ 35:1;
- Raw Material Formula Adjustment: Control the additive ratio ≤ 5%, select PE-specific compatibilizers, and add 0.3-0.5% fluoroelastomer processing aids to improve plasticization uniformity.
3. Melt Degradation (Produces Toxic Gases, Seriously Affects Product Quality)
Fault Phenomena
- The pipe surface turns yellow or black, with coked particles of diameter 0.3-1mm, and is accompanied by a pungent polyethylene decomposition odor in severe cases;
- The pipe becomes brittle, the elongation at break < 200%, and breaks directly in the low-temperature (-10℃) impact test;
- Black smoke emerges from the exhaust port at the rear end of the barrel, and the melt pressure rises abnormally > 30MPa.
Underlying Causes
- The temperature of the homogenizing section > 230℃ or the die temperature > 210℃, leading to HDPE thermal degradation;
- Failure to clean the barrel in time after shutdown, the residual material stays at high temperature for > 30 minutes;
- The gap between the screw and the barrel is < 0.2mm, resulting in excessive mechanical shear heat;
- The proportion of recycled materials > 30%, mixed with contaminated impurities (such as oil stains, metal debris).
Troubleshooting and Resolution
- Emergency Treatment: Immediately reduce the temperature of the barrel and die (homogenizing section ≤ 210℃, die ≤ 200℃), increase the screw speed to 80rpm, and “flush” the barrel with clean HDPE raw materials for 3-5 minutes to discharge the degraded materials;
- Equipment Inspection: Measure the gap between the screw and the barrel with a feeler gauge; if < 0.2mm, stop the machine for adjustment, and control the gap at 0.2-0.5mm appropriately;
- Long-term Control: The proportion of recycled materials ≤ 30%, which needs to be screened through a 40-mesh sieve and dried; Before shutdown, first reduce the temperature to 180℃, empty the material in the barrel and then shut down; Regularly clean the carbon deposits in the barrel (once every 80 hours of production).
II. Die and Forming System Faults: Determine Pipe Appearance and Dimensional Accuracy
The die is the core component of pipe forming. Its structural accuracy, temperature control and cleanliness directly affect the pipe dimensional tolerance and surface quality. The following are practical solutions for 4 types of typical faults:
1. Obvious Weld Lines on Pipe Surface (Longitudinal/Circular Seams)
Fault Phenomena
- Continuous longitudinal seams appear on the pipe surface with a width > 0.5mm, and obvious protrusions can be felt by hand;
- The tensile strength at the weld line decreases by more than 25%, and leakage occurs during the water pressure test (0.8MPa, 1 hour);
- Circular seams appear on large-diameter pipes (> 500mm), and the spacing is positively correlated with the screw speed.
Underlying Causes
- Adopting basket-type die, the melt fails to fully fuse after splitting;
- Excessively low die temperature (< 190℃), poor melt fluidity, and insufficient fusion at the seam;
- Excessively high extrusion speed (> 15m/min), the melt residence time in the die is < 0.5 minutes;
- There are dead corners in the die flow channel, and the residual material degrades to affect the fusion effect.
Troubleshooting and Resolution
- Process Adjustment: Increase the die temperature by 10-15℃ to ensure uniform temperature in the flow channel; Reduce the extrusion speed to ≤ 12m/min to extend the melt residence time;
- Die Optimization: Replace with a spiral die (using spiral flow channel to eliminate weld lines); If replacement is not possible, add guide vanes at the die spreader to optimize the melt flow direction;
- Cleaning and Maintenance: Stop the machine, cool it to below 60℃, disassemble the die, grind the dead corners of the flow channel with fine sandpaper (800 mesh) to remove residual carbon deposits; Wipe the flow channel with anhydrous ethanol before assembly to ensure smoothness and no impurities.
2. Uneven Pipe Wall Thickness (Core Cause of Dimensional Out-of-Tolerance)
Fault Phenomena
- The wall thickness deviation of the same section > ±10% (e.g., the standard wall thickness of DN200 pipe is 8.2mm, the actual maximum is 10mm, and the minimum is 7mm);
- The longitudinal wall thickness fluctuates by > 5%, leading to unqualified pipe pressure resistance (e.g., PE100 grade pipe cannot withstand 1.6MPa pressure);
- The pipe section is elliptical, and the deviation between the major and minor axes > 2mm.
Underlying Causes
- The die orifice and mandrel are not concentric, and the coaxiality deviation > 0.02mm;
- Local blockage of the die flow channel leads to uneven melt pressure distribution;
- Deviation of the spray head angle in the vacuum sizing tank, resulting in uneven shrinkage due to local excessive cooling;
- Uneven pressure of the haul-off machine track, with a pressure difference of > 0.1MPa between the two sides, leading to pipe stress deviation.
Troubleshooting and Resolution
- Die Calibration: Loosen the die fixing bolts, detect the coaxiality of the die orifice and mandrel with a dial gauge, and adjust the eccentricity sleeve to control the deviation ≤ 0.02mm;
- Flow Channel Inspection: Disassemble the die, clean the blockages (mostly degraded materials or impurities) in the spreader and flow channel to ensure smooth flow channel;
- Cooling and Haul-off Adjustment: Adjust the angle of the spray head in the vacuum sizing tank to ensure uniform coverage of cooling water on the pipe surface (the spray range of each spray head overlaps by 10%); Detect the pressure on both sides of the haul-off track with a pressure gauge, and adjust it to 0.3-0.5MPa with a difference ≤ 0.05MPa.
3. Die Coking (Main Inducer of Surface Defects)
Fault Phenomena
- Black spots or stripes appear on the pipe surface, with more than 3 spots per meter and diameter > 0.5mm;
- Coked deposits accumulate on the edge of the die orifice, leading to scratches on the extruded pipe surface;
- Coked deposits fall off into the melt, forming internal impurities and affecting the pipe pressure resistance.
Underlying Causes
- Excessively high die temperature (> 200℃), the material stays in the flow channel for too long (> 1 minute) leading to degradation;
- The raw materials contain decomposable additives (such as inferior antioxidants) or impurities;
- Insufficient polishing of the die flow channel (Ra > 0.8μm), making the material easy to adhere and accumulate;
- Long-term failure to clean the die, resulting in accumulation and degradation of residual materials (continuous production for more than 12 hours).
Troubleshooting and Resolution
- Emergency Cleaning: Stop the machine, cool it to below 60℃, remove the die orifice, scrape off the surface coked deposits with a copper scraper (it is strictly prohibited to scratch the flow channel with iron tools); Polish the flow channel with 800-1200 mesh sandpaper to ensure Ra ≤ 0.4μm;
- Process Optimization: Reduce the die temperature by 5-10℃, and control the material residence time in the flow channel< 1 minute;
- Long-term Prevention: Select high-purity HDPE raw materials and stable additives; Clean the die every 8-12 hours of production, and perform high-temperature flushing with PE-specific cleaning materials (such as PP cleaning particles); Regularly perform precision polishing on the die flow channel (once a month).
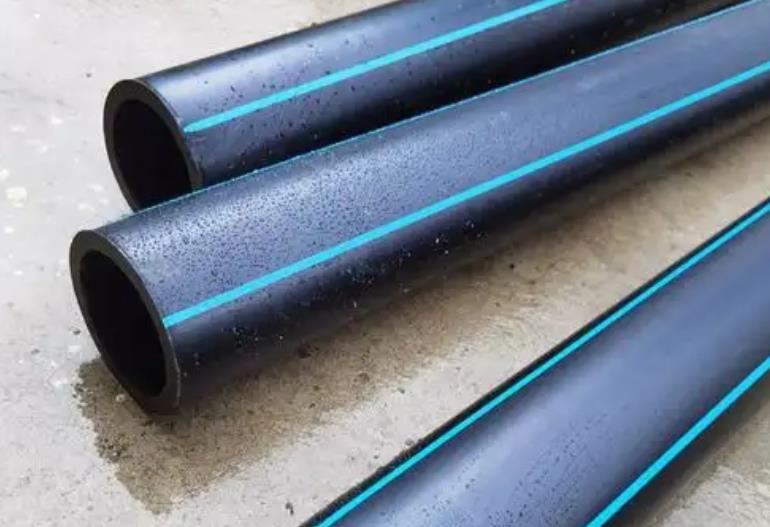
4. Co-extruded Marker Strip Faults (Common Problem in Special Material Pipes)
Fault Phenomena
- The marker strip is diffused and blurred, with a width deviation > 2mm (standard width 5mm);
- The marker strip cannot be extruded or breaks, with poor continuity;
- The marker strip is not firmly bonded to the pipe body and is easy to peel off.
Underlying Causes
- Improper selection of co-extrusion materials (failure to use PE-specific co-extrusion materials);
- Excessively high co-extruder temperature (> 220℃) or mismatched extrusion volume with haul-off speed;
- No cooling water is supplied to the feeding section of the co-extruder, resulting in poor material plasticization;
- Blockage or angle deviation of the co-extrusion flow channel, making the material unable to fuse smoothly.
Troubleshooting and Resolution
- Raw Material Adjustment: Replace with PE-specific co-extrusion materials to ensure good compatibility with the base HDPE;
- Parameter Optimization: Set the co-extruder temperature to 190-210℃, adjust the frequency converter frequency to match the extrusion volume with the haul-off speed (e.g., when the haul-off speed is 10m/min, the co-extrusion volume is controlled at 0.5kg/h);
- Equipment Inspection: Ensure the cooling water jacket in the feeding section of the co-extruder is unblocked, and the water temperature is controlled at 20-30℃; Clean the co-extrusion flow channel and adjust the flow channel angle to make the material fuse smoothly along the pipe surface.
III. Cooling and Sizing System Faults: Affect Pipe Dimensional Stability
The cooling and sizing system fixes the pipe size through vacuum adsorption and temperature control. Its vacuum degree, water temperature and cooling uniformity directly determine the pipe outer diameter accuracy and roundness. The following are solutions for 3 types of core faults:
1. Excessive Pipe Outer Diameter Deviation
Fault Phenomena
- The outer diameter exceeds the tolerance range (e.g., the standard tolerance of DN110 pipe is ±0.6mm, and the actual deviation > 1mm);
- The pipe roundness error > 0.5mm/m, and the section is elliptical;
- “Bamboo joint-like” unevenness appears on the pipe surface, with a circumference fluctuation > 3mm.
Underlying Causes
- Insufficient vacuum degree of the vacuum sizing tank (< 0.03MPa), the pipe cannot be closely attached to the sizing sleeve;
- Worn or mismatched sizing sleeve, resulting in invalid outer diameter control;
- Excessively high cooling water temperature (> 35℃), slow cooling speed, and uneven pipe shrinkage;
- Mismatched extrusion speed and haul-off speed, leading to unbalanced stretching or compression ratio.
Troubleshooting and Resolution
- Vacuum System Inspection: Detect the pipeline pressure with a vacuum gauge; if < 0.03MPa, check whether the water inlet of the vacuum pump is blocked (unblock with fine iron wire) and whether the pipeline leaks (detect bubbles by applying soapy water); After repair, ensure the vacuum degree is stable at 0.05-0.08MPa;
- Sizing Sleeve Maintenance: Replace the sizing sleeve matching the pipe specification, polish the inner wall to Ra ≤ 0.8μm with sandpaper; If the sizing sleeve wear > 0.2mm, replace it directly;
- Cooling and Speed Adjustment: Reduce the cooling water temperature to 10-25℃, increase the cooling water flow (flow rate ≥ 5m³/h) to ensure rapid cooling and shaping; Synchronize the extrusion speed and haul-off speed through the encoder, haul-off speed = extrusion speed × 1.01-1.03 (to compensate for shrinkage).
2. Water Marks/Bubbles on Pipe Surface
Fault Phenomena
- Irregular water marks appear on the pipe surface, affecting the appearance;
- There are tiny bubbles (diameter < 0.3mm) on the surface or inside, which are easy to leak during the water pressure test;
- “Cloudy” water vapor traces appear on the inner wall of large-diameter pipes.
Underlying Causes
- Poor atomization of cooling water in the vacuum sizing tank, and water droplets directly impact the pipe surface;
- Excessively high moisture content in raw materials (> 0.05%), insufficient drying;
- Excessively low cooling water temperature (< 10℃), sudden cooling of the pipe surface leads to condensation;
- Poor sealing of the hopper feed inlet, air mixed into the melt.
Troubleshooting and Resolution
- Cooling System Optimization: Check the spray head of the vacuum sizing tank, replace the blocked or poorly atomized nozzles to ensure the cooling water covers uniformly in the form of mist;
- Raw Material and Sealing Inspection: Strengthen raw material drying (temperature 85-100℃, time 3-4 hours) to ensure moisture content ≤ 0.05%; Install a sealing cover above the hopper, check whether the sealing ring of the feed inlet is aging (replace the aging sealing ring);
- Temperature Adjustment: Raise the cooling water temperature to 15-25℃ to avoid condensation caused by sudden cooling; Install an exhaust port in the feeding section of the extruder to discharge the mixed air.
3. Excessive Internal Stress of Pipe (Hidden Danger of Later Cracking)
Fault Phenomena
- The pipe bends within 30 minutes after cutting, with a bending degree > 2mm/m;
- Longitudinal cracking occurs after storage for 1-3 days, especially in low-temperature environments (< 0℃);
- The ring stiffness is unqualified (e.g., the ring stiffness of SN8 grade pipe < 8kN/m²).
Underlying Causes
- Excessively fast cooling speed, temperature difference between inner and outer layers > 50℃, resulting in thermal stress;
- Excessively high haul-off speed, the pipe is over-stretched (stretch ratio > 1.05);
- Insufficient length of the sizing sleeve (< 6 meters), insufficient cooling;
- Excessively large temperature difference between die temperature and cooling water temperature (> 150℃).
Troubleshooting and Resolution
- Cooling Process Optimization: Adopt multi-stage gradient cooling — vacuum sizing tank (preliminary cooling) → primary cooling water tank (water temperature 25-30℃) → secondary cooling water tank (water temperature 15-20℃), gradually reduce the temperature to ensure the temperature difference between inner and outer layers ≤ 30℃;
- Speed Adjustment: Reduce the haul-off speed to control the stretch ratio at 1.01-1.03;
- Equipment Upgrade: Replace the vacuum sizing tank with a length ≥ 8 meters to ensure sufficient cooling and shaping of the pipe; Adjust the temperature difference between die temperature and cooling water temperature ≤ 120℃ to reduce thermal stress.
IV. Haul-off and Cutting System Faults: Affect Pipe Length Accuracy and End Face Quality
The haul-off and cutting system needs to be accurately synchronized with the extrusion speed, and its stability directly determines the pipe length tolerance and end face flatness. The following are solutions for 3 types of high-frequency faults:
1. Haul-off Slippage
Fault Phenomena
- Relative sliding occurs between the haul-off track and the pipe, with track indentations appearing on the pipe surface but slow length growth;
- The pipe outer diameter is excessively large by > 1mm, and the length dimension error is > ±5mm/m;
- In severe cases, the pipe accumulates and jams in front of the haul-off machine, leading to production line shutdown.
Underlying Causes
- Severe wear of the haul-off track, with the depth of surface anti-slip patterns < 0.5mm, resulting in insufficient friction;
- Excessively low track pressure (< 0.3MPa);
- Oil stains or moisture on the pipe surface, affecting the friction coefficient;
- Excessively high haul-off speed setting, exceeding the track clamping capacity.
Troubleshooting and Resolution
- Emergency Treatment: Reduce the haul-off speed to 80% of the current speed and observe if slipping stops; if slipping still occurs, stop the machine immediately;
- Equipment Maintenance: Replace the worn haul-off track (surface anti-slip pattern depth ≥ 1mm) or install anti-slip rubber pads on the track; adjust the track pressure to 0.4-0.6MPa;
- Surface Treatment: Install an air-drying device (wind speed ≥ 3m/s) after the cooling water tank to remove moisture from the pipe surface; check if the raw materials are mixed with oil stains and replace the contaminated raw materials.
2. Large Cutting Dimension Deviation
Fault Phenomena
- The pipe cutting length error exceeds ±2mm (when the preset length is 6 meters, the actual length is 5.98 meters or 6.03 meters);
- The cutting end face is uneven, with a perpendicularity deviation > 1° and burrs (height > 0.3mm);
- The length error fluctuates periodically, synchronized with the fluctuation of the haul-off machine speed.
Underlying Causes
- Failure of the cutting system encoder, decreased resolution (below 24 bits), unable to accurately detect the haul-off speed;
- Severe wear of the cutting knife, blunt blade edge, increased cutting resistance;
- Large fluctuation of haul-off speed (> ±5%), leading to length calculation error;
- The pipe is not fully fixed during cutting, resulting in displacement;
- Poor electrical grounding, introducing interference pulses that affect the length measurement accuracy.
Troubleshooting and Resolution
- Encoder Calibration: Check if the encoder wiring is unsoldered (whether the aviation connector is in good contact) and use an oscilloscope to detect signal stability; if the resolution is insufficient, replace it with a 24-bit absolute encoder;
- Cutting Knife Maintenance: Replace with a sharp cemented carbide blade, adjust the blade angle (30-45° for planetary cutting machine blades), and check the gap between the moving knife and fixed knife with a feeler gauge (0.03-0.05mm);
- Synchronization and Fixing Optimization: Realize closed-loop control of haul-off and cutting through the PLC system to ensure the haul-off speed fluctuation ≤ ±2%; activate the pipe clamping device before cutting to ensure no displacement of the pipe during cutting; each single machine shell is grounded separately to avoid interference introduced by series grounding.
3. Pipe Cracking During Cutting
Fault Phenomena
- Cracks appear on the end face or surface of the pipe during cutting, with a length > 5mm;
- Large-diameter thick-walled pipes (wall thickness > 50mm) are prone to axial cracking after cutting, with a cracking depth > 10mm;
- Edge chipping occurs on the cutting end face, with a gap width > 2mm.
Underlying Causes
- Insufficient pipe cooling, internal temperature > 40℃, not fully solidified, leading to cracking under force during cutting;
- Excessively high cutting speed, excessive tool impact force (planetary cutting machine speed > 300rpm);
- Excessively high internal stress of the pipe;
- Inappropriate cutting blade material (ordinary carbon steel blades used for thick-walled pipes).
Troubleshooting and Resolution
- Cooling Optimization: Extend the cooling time to ensure the internal temperature of the pipe ≤ 40℃ before cutting; increase the length or number of cooling water tanks (for thick-walled pipes, the length of the cooling water tank is recommended to be ≥ 15 meters);
- Cutting Parameter Adjustment: Reduce the cutting speed (planetary cutting machine speed ≤ 300rpm) and adopt “progressive cutting” (first shallow cut to 1/3 of the wall thickness, then deep cut to cut off);
- Internal Stress and Tool Optimization: Reduce the internal stress of the pipe through gradual cooling and reducing haul-off tension; select cemented carbide blades or diamond-coated blades to improve cutting sharpness and wear resistance.
V. Electrical and Control System Faults: Ensure Continuous Production Line Operation
The electrical control system is the “brain” of the production line, and its stability directly determines production continuity. The following are solutions for 2 types of key faults:
1. Extruder Motor Overload
Fault Phenomena
- The motor current exceeds 10% of the rated value (e.g., the rated current of a 200kW motor is 360A, and the actual current is > 400A);
- The motor housing temperature > 80℃, the thermal protection device alarms, and the production line shuts down automatically;
- The vibration of the gearbox intensifies, and the vibration acceleration value > 7.1m/s².
Underlying Causes
- Excessively small gap between the screw and the barrel (< 0.2mm), resulting in large frictional resistance;
- Poor raw material fluidity (melt flow rate < 0.1g/10min), leading to large extrusion resistance;
- Failure of the heating system, the temperature of a certain section does not reach the set value (temperature difference > ±5℃), resulting in poor material plasticization;
- Wear of the motor bearing, increasing operating resistance;
- Contamination of the gearbox lubricating oil (NAS grade exceeding 8), increasing gear transmission resistance.
Troubleshooting and Resolution
- Emergency Treatment: Stop the machine immediately, cut off the power supply, and conduct troubleshooting after the motor cools down;
- Equipment Inspection: Measure the gap between the screw and the barrel with a feeler gauge; if < 0.2mm, adjust or replace the components; check the motor bearing, add lubricating oil or replace the worn bearing; detect the cleanliness of the gearbox lubricating oil; if the NAS grade exceeds 8, immediately replace it with ISO VG220 heavy-duty gear oil;
- Raw Material and Process Adjustment: Replace with raw materials with moderate melt flow rate (recommended melt flow rate 0.3-1.0g/10min), or add 0.3-0.5% processing aids to improve fluidity; repair the heating system (replace damaged heating coils and temperature sensors) to ensure the temperature of each section reaches the set value.
2. Central Control System Crash/Signal Loss
Fault Phenomena
- The PLC touch screen is unresponsive, unable to operate parameters, and the display screen freezes;
- Loss of signals from sensors such as temperature, pressure, and speed, with values displayed as 0 or abnormally maximum;
- Production line out of control (e.g., sudden surge in extrusion speed, sudden stop of the haul-off machine).
Underlying Causes
- Unstable power supply voltage, fluctuation exceeding ±10%;
- Poor heat dissipation of the control system, excessive temperature (> 60℃);
- Poor contact of signal lines or electromagnetic interference (close to strong interference sources such as frequency converters);
- Program failure or virus infection.
Troubleshooting and Resolution
- Emergency Treatment: Restart the control system (first turn off the PLC power supply, wait for 30 seconds and then restart); if restarting is ineffective, enable the backup control system program;
- Power Supply and Heat Dissipation Optimization: Install a regulated power supply with an accuracy of ±5% to ensure stable power supply; check the cooling fan of the control system, clean the dust on the heat sink, and maintain the ambient temperature ≤ 40℃;
- Signal and Program Maintenance: Fasten the signal line connectors, use shielded cables, and keep away from strong electromagnetic interference sources such as frequency converters; back up the control system program and perform regular anti-virus maintenance; if the program is damaged, reload the original factory backup program.
VI. Fault Prevention and Daily Maintenance Rules
By establishing a standardized maintenance process, the unplanned downtime rate can be controlled within 3%, greatly improving production efficiency. The specific maintenance rules are as follows:
1. Daily Inspection Items (Before Startup/During Production/After Shutdown)
- Before Startup: Check the raw material moisture content (≤0.05%) and hopper cleanliness; detect the temperature of each heating coil (temperature difference ≤ ±3℃); check the vacuum system pressure (0.05-0.08MPa); verify the haul-off track pressure (0.4-0.6MPa);
- During Production: Record the extruder current, melt pressure, and cooling water temperature every 2 hours; observe the pipe surface quality (no cracks, no bubbles, no weld lines); check the cutting dimension accuracy (error ≤ ±2mm);
- After Shutdown: Clean the residual raw materials in the hopper, turn off the cooling water and compressed air; clean the surface of the die orifice; check if the temperature of each motor and bearing is normal.
2. Weekly Maintenance Items
- Clean the die flow channel and check the screw wear condition (measure with an external micrometer, repair if wear > 0.3mm);
- Calibrate the encoders of the haul-off and cutting systems to ensure the measurement accuracy error ≤ 0.1%;
- Check if the vacuum pipeline leaks and clean the vacuum pump filter;
- Detect the cooling water circuit pressure (≥0.3MPa) and clean the filter scale.
3. Monthly Maintenance Items
- Replace the lubricating oil/hydraulic oil of the extruder, haul-off machine, and gearbox (replace according to the model in the equipment manual, oil cleanliness NAS grade ≤ 8);
- Check the motor bearing, add lubricating oil, and measure the vibration acceleration (≤7.1m/s²);
- Calibrate temperature sensors and pressure sensors (send to a third-party testing agency or calibrate with standard instruments);
- Check the wear condition of the haul-off track, replace if the anti-slip pattern depth < 0.5mm.
4. Quarterly Maintenance Items
- Disassemble the die for thorough cleaning and polishing (flow channel Ra ≤ 0.4μm);
- Check the fit gap between the barrel and the screw (0.2-0.5mm), and repair if necessary;
- Test the stability of the electrical system and check the insulation of the lines;
- Conduct practical training on fault troubleshooting for operators.
Conclusion
Fault handling of HDPE pipe extrusion production lines should follow the principle of “first observe phenomena, then investigate causes, and finally solve accurately”, and quickly locate problems by combining quantitative parameters and practical steps. By establishing a sound daily maintenance system and process parameter database, most faults can be effectively prevented. If the fault cannot be resolved continuously (such as severe die wear, damage to core components of the control system), it is recommended to contact the equipment manufacturer in a timely manner for professional technical support.